

How To Change 2000 F150 Leaf Springs
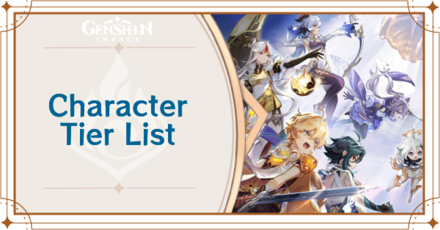
This is Game8'southward Genshin Bear upon Graphic symbol Tier List as of March 2022. See the latest and updated grapheme rankings of Version 2.5, too equally all the best characters for Master DPS, Sub-DPS, and Support roles. We'll update with any changes to the rankings and all new characters, so continue checking back for the latest tier listing updates!
| Popular Grapheme Guides | ||
|---|---|---|
 Reroll Tier List Reroll Tier List |  Character Tier Listing Character Tier Listing |  All-time Team Comp All-time Team Comp |
Tier List
C0 Tier List
C6 Tier List
For example:
• Ningguang gains a small support passive at C4, but no further impactful support passives past C4. Thus Ningguang is added to Support C Tier at C4.
• Xingqiu is a loftier ranked Sub-DPS and is considered at his best at C6.
| | ・Characters that perform above and beyond others in their respective roles. ・Characters that hands become core political party members. |
|---|---|
| | ・Characters with high performance in their respective roles, but don't push the limits in terms of Talents and Constellations. |
| | ・Characters with solid operation in their corresponding roles. ・Characters that shine in specific party compositions. |
| | ・Functional characters that will exist chop-chop replaced due to their talents, stats, etc. |
| | ・Characters with limited combat utility. ・Characters more suited for exploration. |
| Role | Part |
|---|---|
| DPS | ・The main harm dealer of the political party. ・Normal and Charged Attacks are the focus of their DMG. |
| Sub DPS | ・Uses Elemental Skills or Bursts to provide Elemental Reactions to support master DPS. ・Characters with flexible Elemental Skill or Burst utility. ・Typically swapped out after Skill or Burst use. |
| Support | ・Provides support via Elemental Skills, Outburst or Passive Talents. ・Provides buffs, debuffs, shields, or heals. |
Polls have been reset for Version 2.5. See the results of the Version two.4 polls below!
With new characters introduced since the 2.5 update, players are hotly debating the current superlative 5-star characters in Genshin Impact. Give your vote and discuss the hots and nots with other players in the comments below!
Jump to the comments! (7023)
| | |
|---|---|
| | |
| | |
Results are in for the Version two.iv polls, and our wandering samurai, Kazuha, has won the polls with 3668 votes! Raiden and Zhongli were neck and neck, only in the end, Eternity triumphed for 2nd identify!
| Added | Character | Summary |
|---|---|---|
| 02/22 | Overall Changes | Primary Tier List Support • Jean: A -> South • Kokomi: A -> S • Gorou: S -> A • Sara: S -> A C0 Tier List Sub-DPS • Yae Miko: A -> S Back up • Kokomi: A -> S • Jean: A -> S • Sucrose: B -> A • Shenhe: B -> A C6 Tier List Support • Kokomi: A -> S |
| 02/sixteen | | Main Tier Listing • Main DPS: A Tier at C2 • Sub-DPS: S Tier at C2 C0 Tier List • Master DPS: B Tier • Sub-DPS: A Tier C6 Tier List • Master DPS: A Tier • Sub-DPS: SS Tier |
| 02/07 | | Main Tier List • Added to B rank as Main DPS • Adjusted position equally Sub-DPS • Updated recommended weapon and artifact |
Previous Changes
| Update Date | Character | Summary |
|---|---|---|
| 01/xviii | Multiple Adjustments to the Main Tier List | DPS Tier List • Ganyu: S -> SS • Raiden: South -> SS • Yoimiya: A -> S • Tartaglia: A -> S • Swapped Ningguang & Diluc in A |
| 01/xviii | Multiple Adjustments to the C0 Tier List | DPS Tier List • Ganyu: S -> SS • Tartaglia: A -> S • Yoimiya: A -> S Sub DPS Tier List • Shenhe: A -> B |
| 01/eighteen | Adjustments to the C6 Tier List | DPS Tier List • Kokomi: B -> A |
| 01/05 | | • Sub-DPS Rank: Due south C2 • Back up Rank: S C6 • C0 Sub-DPS Rank: A • C0 Support Rank: B • C6 Sub-DPS Rank:S • C0 Support Rank: S |
| 01/05 | | • Main DPS Rank: B C0 • Support Rank: S C6 • C0 Chief DPS Rank: B • C0 Back up Rank: A • C6 Main DPS Rank:C • C0 Support Rank: S |
| Genshin Impact Version 2.5 | |
|---|---|
| | |
| Release Date | February 16, 2022 |

The featured character banners for Version 2.v have already been announced during the latest livestream.
| Character | Chemical element | Weapon |
|---|---|---|
| | | |
| | | |
Raiden Shogun and Kokomi's rerun banners are now live with the release of phase 2 of Version 2.5.
Update 2.5 Release Date and Patch Notes
| Genshin Bear upon Version 2.six | |
|---|---|
 | |
| Release Engagement | March xxx, 2022 |
No announcements have been fabricated yet in regards to the featured characters, we will update this section in one case whatever data becomes available!
| Character | Element | Weapon |
|---|---|---|
| | | |
Kamisato Ayato has been revealed on Genshin Impact'southward official twitter business relationship, hinting that he will be released during Version 2.6 of the game.
2.six Release Date and Patch Notes
| Jump to a Department | ||
|---|---|---|
| | | |
| Character | Assumed Build | ||
|---|---|---|---|
 Hu Tao Hu Tao | Weapon | Antiquity | |
| | | ||
| ・Deals large amounts of Pyro DMG with her Elemental Skill. ・Sacrifices HP for even more DMG output. ・Works corking in Co-op play. | |||
 Ayaka Ayaka | Weapon | Antiquity | |
| | | ||
| ・Infuses Cryo element in Normal and Charged Attacks after sprinting. ・Increases Normal and Charged ATK DMG After Skill. ・C6 increases Charged Attack DMG by 298%. | |||
 Ganyu Ganyu | Weapon | Artifact | |
| | | ||
| ・Level two Charged Shot is great vs mobs of enemies. ・Using her Charged Shot afterwards her Elemental Outburst creates a high harm skill combo. ・C6 removes the charge up for her Charged Shot after her Elemental Skill. | |||
 Itto Itto | Weapon | Artifact | |
| | | ||
| ・Loftier Crit Rate and Charged Set on harm. ・Elemental Skill tin taunt enemies. ・Elemental Burst increases overall DPS. | |||
 Raiden Raiden | Weapon | Artifact | |
| | | ||
| ・Deals high Electro DMG. ・Increases team'southward Elemental Burst DMG. ・Flexible because of the weapon switch during the Elemental Burst. | |||
| Grapheme | Assumed Build | ||
|---|---|---|---|
 Eula Eula | Weapon | Artifact | |
| | | ||
| ・Elemental Outburst tin deal lots of impairment especially when paired with Pyro for Cook reactions ・ Consuming two stacks from Elemental Skill debuffs enemies and raises DPS output | |||
 Xiao Xiao | Weapon | Artifact | |
| | | ||
| ・Elemental Burst increases overall DPS. ・Normal Attacks and Elemental Skill prepare high DMG combos. ・Easily fights in midair against aeriform enemies. | |||
 Yoimiya Yoimiya | Weapon | Antiquity | |
| | | ||
| ・Elemental Skill infuses normal attacks with Pyro. ・Even without her Elemental Skill, Yoimiya can bargain high Pyro DMG with her Charged Attacks. ・More constellation levels volition increase harm output. | |||
 Tartaglia Tartaglia | Weapon | Artifact | |
| | | ||
| ・Deals large amounts of impairment in Melee Mode. ・Gets insanely potent at full constellation. ・Switches from Bow to dual blades. | |||
| Character | Assumed Build | ||
|---|---|---|---|
 Noelle Noelle | Weapon | Artifact | |
| | | ||
| ・Balances ATK and DEF stats for smashing sustain DMG. ・Elemental Outburst boots DMG. ・C6 further boosts DMG based on DEF | |||
 Yanfei Yanfei | Weapon | Artifact | |
| | | ||
| ・Stiff Charged attacks. ・With Scarlet Seals her damage and range increases. | |||
 Ningguang Ningguang | Weapon | Artifact | |
| | | ||
| ・High single target DMG. ・C1 Attacks Bargain AoE DMG ・Jade Screen blocks projectiles and grants buffs. | |||
 Diluc Diluc | Weapon | Artifact | |
| | | ||
| ・Pyro Element meshes well with the claymore for heavy firepower ・Elemental Skill has a short cooldown time. ・Elemental Flare-up is powerful with a broad range. | |||
 Klee Klee | Weapon | Artifact | |
| | | ||
| ・Attacks primarily with wide-range harm, cleaning upwards swaths of foes. ・Powerful explosive attacks permit her to take advantage of Elemental Reactions. | |||
 Kokomi Kokomi | Weapon | Artifact | |
| | | ||
| ・Impairment and Heals are dependent on HP. ・Apply to deal Hydro DMG. ・Weapons and artifacts that raise Crit Rate or Crit Harm are not recommended. | |||
| Graphic symbol | Assumed Build | ||
|---|---|---|---|
 Keqing Keqing | Weapon | Artifact | |
| | | ||
| ・Powerful AoE attacks and Elemental Reactions. ・Can easily attack the weak point of enemies. | |||
 Mona Mona | Weapon | Artifact | |
| | | ||
| ・Powerful Accuse Attacks ・DMG increases with Free energy Recharge. ・C1 tin further boost Vaporize DMG.. | |||
 Razor Razor | Weapon | Artifact | |
| | | ||
| ・Uses his burst to increase his damage output profoundly. ・High damage from the combination of claymore and melee attacks. | |||
 Fischl Fischl | Weapon | Artifact | |
| | | ||
| ・Abiding DMG from Normal attacks and Oz. ・Easy to set upwardly Elemental Reactions with. ・Constellations boost Oz's up time and DMG. | |||
 Kaeya Kaeya | Weapon | Artifact | |
| | | ||
| ・Constantly freezes enemies. ・Expert at clearing mobs of enemies. ・Expert culling if no other choice for Cryo Principal DPS. | |||
 Qiqi Qiqi | Weapon | Artifact | |
| | | ||
| ・DPS whose main source of harm is Physical Impairment. ・Pair with Electro character to trigger Superconduct and deal AoE Cryo damage and lower enemy defense. | |||
 Beidou Beidou | Weapon | Artifact | |
| | | ||
| ・Counter stance and shield provide great defense and offense. . ・C1 Increases reliability of Beidou's shield. | |||
 Yun Jin Yun Jin | Weapon | Artifact | |
| | | ||
| ・Belongings Elemental Skill tin bargain big Geo harm. ・Elemental Outburst can buff normal assail impairment. | |||
| Character | Assumed Build | ||
|---|---|---|---|
 Rosaria Rosaria | Weapon | Antiquity | |
| | | ||
| ・Can deal decent amounts of Physical DMG. ・Her Elemental Skill teleports her behind enemies and raises her CRIT Rate. ・At C6, she also lowers enemies' Physical RES past -20%. | |||
 Xinyan Xinyan | Weapon | Artifact | |
| | | ||
| ・Great confronting multiple enemies. ・Burst increases Concrete DMG. ・Can increase Physical DMG with Constellations. | |||
 Aloy Aloy | Weapon | Artifact | |
| | | ||
| ・Deals high Cryo DMG. ・Can increase own ATK DMG with Elemental Skill. | |||
| Jump to a Section | ||
|---|---|---|
| | | |
| Character | Assumed Build | ||
|---|---|---|---|
 Xingqiu Xingqiu | Weapon | Artifact | |
| | | ||
| ・Elemental Burst and Skill provides DMG reduction besides as Elemental Reaction Triggers. ・High Recharge Charge per unit on Elemental Skill keeps Rainsword uptime high. | |||
| Ayaka | Weapon | Artifact | |
| | | ||
| ・Provides Cryo application through Special Sprint and Elemental Skill. ・Elemental Skill decently covers a wide expanse. ・C2 improves Elemental Flare-up. | |||
 Albedo Albedo | Weapon | Artifact | |
| | | ||
| ・Persisting AoE Elemental Skill ・Elemental Burst deals multiple damage instances ・Elemental Burst Damage Increases at C2 | |||
| Raiden | Weapon | Artifact | |
| | | ||
| ・Deals high Electro DMG. ・Can set up upwards Electro reactions with her Elemental Skill. | |||
 Xiangling Xiangling | Weapon | Artifact | |
| | | ||
| ・Can inflict multiple instances of Pyro DMG with Elemental Skill and Burst. ・Elemental burst persists on Main DPS. ・Best paired with other Pyro units. | |||
 Kazuha Kazuha | Weapon | Antiquity | |
| | | ||
| ・Can pull and stun enemies to make them easier to hit and flare-up downward. ・Flare-up increases Elemental Mastery in an surface area. | |||
 Venti Venti | Weapon | Antiquity | |
| | | ||
| ・Powerful crowd command from Elemental Burst. ・High energy recharge rate. ・Constellations reduce enemy elemental resistances. | |||
| Character | Causeless Build | ||
|---|---|---|---|
 Yae Miko Yae Miko | Weapon | Antiquity | |
| | | ||
| ・Elemental Skill deals Electro over time making it a expert starting point for Elemental Reactions. ・Having Yae Miko at C2 increases the harm and range of her Elemental Skill. | |||
| Ganyu | Weapon | Artifact | |
| | | ||
| ・All Skills have an AoE issue great against mobs of enemies. ・Elemental Skill provides a decoy to reduce aggro. ・ With high Energy Recharge her Elemental Burst is almost always up. | |||
 Shenhe Shenhe | Weapon | Artifact | |
| | | ||
| ・Can bargain continuous AoE Cryo damage with Elemental Burst. ・C2 increases effectivity of Elemental Outburst. | |||
| Tartaglia | Weapon | Artifact | |
| | | ||
| ・Reliable massive DMG from Elemental Burst. ・Can quickly and hands trigger multiple Vaporize Reactions ・Ranged and melee stances offers flexibility against various enemies. | |||
| Fischl | Weapon | Antiquity | |
| | | ||
| ・Oz stays on the field to deal continuous Electro DMG. ・Skill and Burst keep Oz uptime high. ・C6 further increases Oz's DMG based on Fish's ATK and uptime. | |||
 Zhongli Zhongli | Weapon | Artifact | |
| | | ||
| ・Loftier Assail Elemental Recharge and Burst DMG. ・Shields support Primary DPS and is stiff against Geo enemies. ・Powerful crowd command via Petrify from Elemental Burst. | |||
| Mona | Weapon | Artifact | |
| | | ||
| ・Elemental Skill can provide crowd control to back up Main DPS. ・Elemental Burst massively amplifies Vaporize DMG. ・C1 increases Elemental Reaction DMG further. | |||
| Grapheme | Causeless Build | ||
|---|---|---|---|
| Beidou | Weapon | Artifact | |
| | | ||
| ・Can aim for continuous Electro DMG. ・Burst works great when surrounded by enemies. ・At C4, she gets boosted Electro DMG, increasing her Bursts every bit well. | |||
| Rosaria | Weapon | Artifact | |
| | | ||
| ・Continuously inflicts Cryo DMG with her burst. ・Burst is great for AoE DMG. ・At C2, the elapsing of her Flare-up is increased. ・Hands sets upward Melt reactions when combined with Pyro characters. | |||
| Kaeya | Weapon | Artifact | |
| | | ||
| ・Depression Elemental Skill cooldown. ・Elemental Skill will persist on Master DPS. ・Neat Sub-DPS for a Cryo Primary DPS team. | |||
| Kokomi | Weapon | Artifact | |
| | | ||
| ・Harm can be increased with more than HP. ・Attacks are imbued with Hydro. ・Weapons and artifacts that raise Crit Rate or Crit Damage are not recommended. | |||
 Sara Sara | Weapon | Artifact | |
| | | ||
| ・Deals high Electro DMG from Burst. | |||
 Sucrose Sucrose | Weapon | Artifact | |
| | | ||
| ・Can group up enemies with Elemental Burst. ・Elemental Burst makes multiple swirl and elemental reaction triggers | |||
| Character | Assumed Build | ||
|---|---|---|---|
 Sayu Sayu | Weapon | Antiquity | |
| | | ||
| ・Since the Elemental Burst is continous, information technology is easy to proceed triggering Elemental reactions. ・Elemental Skill is easy to use. | |||
 Chongyun Chongyun | Weapon | Artifact | |
| | | ||
| ・Elemental Skill changes melee attacks to the Cryo Element, allowing for easy Elemental Reaction setup. ・Constellations farther heave Elemental Skill DMG. | |||
 Jean Jean | Weapon | Artifact | |
| | | ||
| ・Elemental skill is constructive against multiple enemies. ・Elemental Skill has a large AoE and provides heals. ・C2 Increases political party mobility and ATK speed. | |||
| Character | Assumed Build | ||
|---|---|---|---|
 Lisa Lisa | Weapon | Artifact | |
| | | ||
| ・Elemental Skill and Outburst have wide AoE. ・C2 provides DEF buff and makes her debuff easier to apply. | |||
 Thoma Thoma | Weapon | Artifact | |
| | | ||
| ・Elemental Burst deals a lot of Pyro impairment. ・C2 increases the elapsing of his Elemental Flare-up. | |||
 Traveler (Geo) Traveler (Geo) | Weapon | Artifact | |
| | | ||
| ・High Elemental Skill DMG. ・Can block enemies with Elemental Skill and Flare-up. ・C4 increases Elemental Flare-up Recharge Charge per unit. | |||
 Amber Amber | Weapon | Artifact | |
| | | ||
| ・Can apply AoE Pyro with Burst. ・Use Elemental Skill to taunt enemies abroad from Main DPS. ・C6 Constellation provides political party-broad buffs with Elemental Outburst. | |||
 Traveler (Anemo) Traveler (Anemo) | Weapon | Antiquity | |
| | | ||
| ・Provides AoE crowd control with elemental Skill and Burst. ・High Elemental SKill Recharge Charge per unit. | |||
| Jump to a Section | ||
|---|---|---|
| | | |
| Character | Assumed Build | ||
|---|---|---|---|
| Zhongli | Weapon | Artifact | |
| | | ||
| ・Can quickly deploy shields and petrify enemies. ・C2 provides shields in Co-op via Elemental Burst. | |||
 Bennett Bennett | Weapon | Antiquity | |
| | | ||
| ・Elemental Burst provides heals, ATK Buffs and Pyro infusion. ・High Elemental Recharge Rate. ・C1 Increases Elemental Outburst utility. | |||
| Kazuha | Weapon | Antiquity | |
| | | ||
| ・Smashing at crowd controlling enemies. ・Burst increases Elemental Mastery in an expanse. | |||
| Raiden | Weapon | Artifact | |
| | | ||
| ・Increases the team'southward DMG and Energy Recharge. ・Increases the squad's Elemental Burst DMG. ・Lets you hands ready up Electro reactions. | |||
 Diona Diona | Weapon | Artifact | |
| | | ||
| ・Constantly provides shields and heals. ・C1 increases Elemental Flare-up Recharge Charge per unit ・Buffs shielded character's DMG at C6. | |||
| Graphic symbol | Causeless Build | ||
|---|---|---|---|
| Sucrose | Weapon | Artifact | |
| | | ||
| ・Elemental Burst provides oversupply command. ・Can lower enemy elemental resistances. ・Constellations provide more charges for her Elemental Skill. | |||
| Yun Jin | Weapon | Artifact | |
| | | ||
| ・Boosts normal attack damage with Elemental Outburst. ・Normal attack impairment buff increases when in party with different elements. | |||
| Mona | Weapon | Artifact | |
| | | ||
| ・Elemental Burst debuffs enemies. ・Elemental burst also provides crowd command for small enemies. ・Decoy can kite enemies. | |||
| Venti | Weapon | Artifact | |
| | | ||
| ・Provides strong consistent crowd control. ・Elemental Skill can be uses to dodge attacks and crowd control pocket-size enemies. | |||
| Kokomi | Weapon | Artifact | |
| | | ||
| ・Multiple means to heal. ・Stamina consumption while swimming is decreased. | |||
| Jean | Weapon | Antiquity | |
| | | ||
| ・Elemental Skill and Charge assail can oversupply control enemies. ・Elemental Burst acts equally a outburst AoE heal. ・C6 provides DMG Reduction for Elemental Burst. | |||
| Albedo | Weapon | Artifact | |
| | | ||
| ・Constant shields via Crystallize Reactions. ・Elemental Skill tin support Bow and Goad users ・C6 boosts party DMG within Elemental SKill AoE. | |||
| Shenhe | Weapon | Artifact | |
| | | ||
| ・Buffs attacks with Elemental Skill. ・Can decrease enemies' physical defence force. ・Provides constant Cryo harm with Elemental Burst. | |||
| Character | Causeless Build | ||
|---|---|---|---|
 Gorou Gorou | Weapon | Artifact | |
| | | ||
| ・Great Geo Back up that provides Geo DMG, shields, and buffs. ・Using Elemental Burst at C4 will heal active characters within its AoE. | |||
| Sara | Weapon | Artifact | |
| | | ||
| ・Increases party members' ATK. | |||
 Barbara Barbara | Weapon | Antiquity | |
| | | ||
| ・Boasts peak-course healing abilities. ・At Constellation Level half-dozen, gains the ability to revive downed teammates to 100% health. | |||
| Qiqi | Weapon | Artifact | |
| | | ||
| ・Easy-to-use melee attack sets her autonomously. ・Cryo attacks tin can create Elemental Reactions to freeze enemies' movement. ・Skills are like shooting fish in a barrel to utilise together with other characters. | |||
| Sayu | Weapon | Artifact | |
| | | ||
| ・Recovers HP with her Elemental Outburst. ・Restores HP when Elemental Reactions occur. ・The amount of HP recovered can be increased with Elemental Mastery. | |||
| Graphic symbol | Causeless Build | ||
|---|---|---|---|
 Traveler (Electro) Traveler (Electro) | Weapon | Antiquity | |
| | | ||
| ・Elemental Skill helps in filling up energy. ・Elemental Skill also increases Energy Recharge. ・C2 decreases enemies' Electro RES Elemental Burst. | |||
| Rosaria | Weapon | Artifact | |
| | | ||
| ・Her Flare-up increases CRIT Charge per unit for all party members by 15% of Rosaria's CRIT Rate. ・Aim to brand Rosaria's CRIT Charge per unit 100%. ・At C6, she decreases enemy Concrete RES by -xx%, a very strong debuffer for Concrete DMG mains! | |||
| Xinyan | Weapon | Artifact | |
| | | ||
| ・Elemental Skill provides shield and Pyro DMG. ・Shield provides Physical DMG Buff. | |||
| Thoma | Weapon | Artifact | |
| | | ||
| ・Ideal for the support role to give shields against Pyro element. ・C6 boosts DPS of all characters shielded with his Elemental Skill. | |||
| Traveler (Geo) | Weapon | Artifact | |
| | | ||
| ・C1 increases Elemental Burst Crit Rate. ・Provides shields via Crystallize reactions. | |||
| Chongyun | Weapon | Artifact | |
| | | ||
| ・Elemental Skill increases ATK Speed and provides Cryo DMG infusion for melee characters. ・Loftier Recharge Rate makes Elemental Skill awarding constant. | |||
| Character | Assumed Build | ||
|---|---|---|---|
| Xingqiu | Weapon | Antiquity | |
| | | ||
| ・Rainswords provide DMG reduction, Heals based on Xinqiu's Max hp and DMG. ・Loftier Elemental Recharge ensures constant uptime on Rainswords. | |||
| Ningguang | Weapon | Artifact | |
| | | ||
| ・Jade Screen provides Geo DMG buff when passing through. ・C4 adds AoE defence force buff to Jade Screen | |||
| Noelle | Weapon | Antiquity | |
| | | ||
| ・Elemental Skill shields and provides Heals. ・Shield can activate as emergency defense even when not on the field. | |||
| | |
|---|---|
| | |
| | |
| | |
| | |
Characters with high impairment from Normal and Charged Attacks, Elemental Skill and Flare-up. Talents and Constellations should besides further improve overall damage output. Also effective confronting Bosses and Elite enemies equally well equally groups of smaller enemies.
Sub attackers should have high dissentious skills and bursts that can be refreshed quickly with high free energy recharge.
Sub-DPS should be able to apply elemental statues to enemies in various ways either due to furnishings of their skills and burst or through certain conditions set by their Talents and Constellations.
Due to Vaporize and Cook having the higher potential harm of all the reactions, Pyro, Cryo and Hydro characters are valued highly as Sub-DPS.
Characters that tin finer apply shields for defense, vitrify stats or provide heals are valued as Support characters.
The difficulty of utilise, and amounts of buffs and heals based on a characters constellations and talents are all taken into consideration when rating characters.

All Tier Lists
| All Genshin Touch Tier Lists | |
|---|---|
| Character Tier List |  Best Team Comp Best Team Comp |
 Weapons Tier List Weapons Tier List |  Antiquity Tier List Antiquity Tier List |
 Reroll Tier List Reroll Tier List |  Best Costless Characters Best Costless Characters |

Source: https://game8.co/games/Genshin-Impact/archives/297465
Posted by: martinpervou.blogspot.com
0 Response to "How To Change 2000 F150 Leaf Springs"
Post a Comment